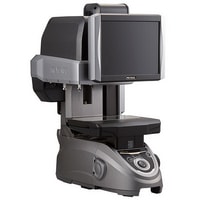
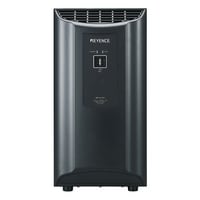
| Model | IM-6225T | |
| Type | Head | |
| Image sensor | 1″ 6.6 mega pixel monochrome CMOS | |
| Display | 10. 4″ LCD monitor (XGA: 1024 ? 768) External monitor connectable (clone output) |
|
| Receiver lens | Double telecentric lens | |
| Image measurement | Field of view | Wide field: o100 ? L200 mm, High precision: 25 ? L125 mm |
| Minimum display unit | 0.1 µm | |
| Repeatability | W/o stage movement | Wide field: ±1 µm, High precision: ±0. 5 µm |
| With stage movement | Wide field: ±2 µm, High precision: ±1. 5 µm | |
| Measurement accuracy (±2?) | W/o binding | Wide field: ±5 µm*1, High precision: ±2 µm*2 |
| With binding | Wide field: ±(7 + 0. 02 L) µm*3, High precision: ±(4 + 0. 02 L) µm*4 | |
| Height measurement | Measuring range | 0 to 60 mm |
| Measurement force | 0.3 N | |
| Measurement position accuracy (XY) | ±0.7 mm | |
| Minimum display unit | 1 µm | |
| Measurable area (XY) | Standard probe | Wide field: 45 ? 95 mm, High precision: 7.5 ? 25 mm |
| Wide-range probe | Wide field: 95 ? 95 mm, High precision: 60 ? 25 mm | |
| Repetition accuracy | Standard probe | ±2 µm*5 |
| Wide-range probe | ±5 µm*5 | |
| Measurement accuracy | Standard probe | ±7.5 µm*6 |
| Wide-range probe | ±15 µm*6 | |
| External remote input | Non-voltage input (with and without contact) | |
| External output | OK/NG/FAIL/MEAS. | Relay output/rated load: 24 VDC, 0. 5 A/ON resistance |
| Interface | LAN | RJ-45 (10BASE-T/100BASE-TX/1000BASE-T) |
| USB 2.0 series A | 6 ports (front: 2, rear: 4) | |
| Record | Hard disk drive | 250 GB |
| Illumination system | Transparent | Telecentric transparent illumination |
| Ring | Four division, multi-angle illumination (electric) Slit ring (directivity) illumination (electric) |
|
| X stage | Moving range | 100 mm (electric) |
| Z stage | 30 mm (electric) | |
| Withstand load | 2 kg | |
| Power supply | Power voltage | 100 to 240 VAC 50/60 Hz |
| Power consumption | 310 VA max. | |
| Environmental resistance | Ambient temperature | +10 to +35 °C |
| Relative humidity | 20 to 80 % RH (No condensation) | |
| Weight | Approx. 34 kg | |
| *1 In the range of o80 mm from the centre of the stage within the operating ambient temperature range of +23°C ±1.0°C at the focused focal point position *2 In the range of o20 mm from the centre of the stage within the operating ambient temperature range of +23°C ±1.0°C at the focused focal point position *3 In the range of o80 ? 180 mm from the centre of the stage, within the operating ambient temperature range of +23°C ±1.0°C at the focused focal point position, and with a load weighing 1 kg or less on the stage (L = amount of stage movement in mm units) *4 In the range of o20 ? 120 mm from the centre of the stage, within the operating ambient temperature range of +23°C ±1.0°C at the focused focal point position, and with a load weighing 1 kg or less on the stage (L = amount of stage movement in mm units) *5 When the maximum measurement height is set to 30 mm or less; ±3 µm for the standard probe and ±6 µm for the wide-range probe when the maximum measurement height is greater than 30 mm and less than or equal to 60 mm *6 When the maximum measurement height is set to 30 mm or less; ±12 µm for the standard probe and ±21 µm for the wide-range probe when the maximum measurement height is greater than 30 mm and less than or equal to 60 mm |
Измерительная система Keyence IM-6225T
Heads with the contact height measurement unit
Описание
Получить КП
Для получения коммерческого предложения, пожалуйста, вышлите ваш запрос на электронную почту info@keyence-datchiki.ru с указанием требуемых позиций и реквизитами компании.
Категория: Измерительные системы


